
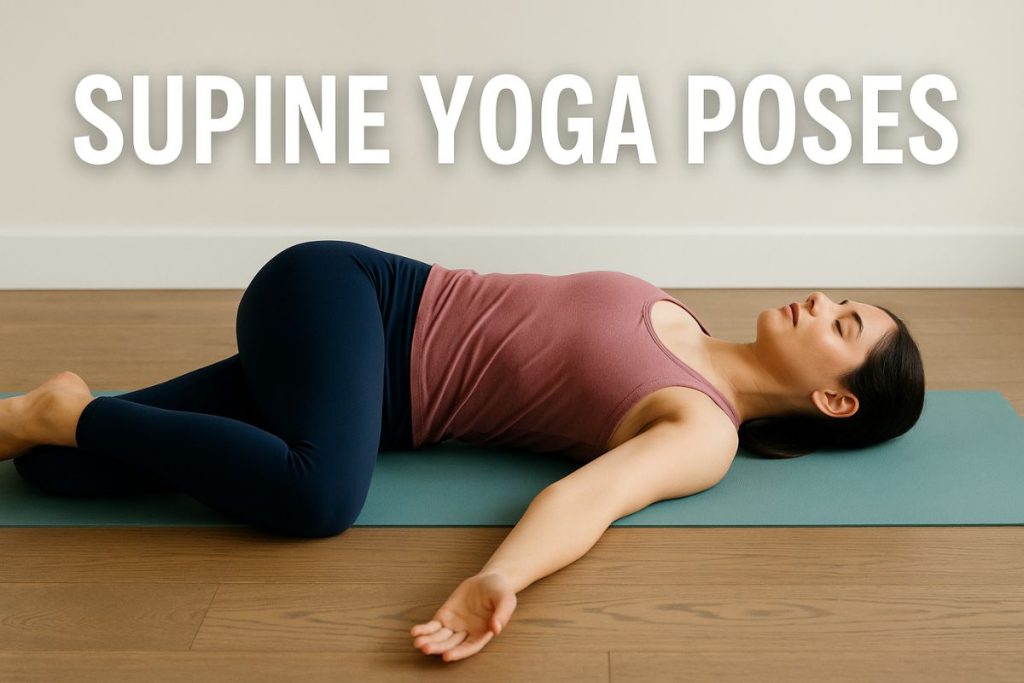
Supine yoga poses (reclined or back lying asanas) are practiced lying on the back, usually toward the end of a class for deep relaxation. These “Supta” poses (from the Sanskrit supta, meaning “reclined” or “supine”) leverage gravity to gently stretch muscles and calm the nervous system. In this comprehensive guide, we explore why supine poses matter, their benefits for body and mind, and detailed tips (with images) for common supine poses. Whether you’re a beginner or a yoga teacher, you’ll learn how to safely incorporate supine yoga into your practice for maximum relaxation and healing.
Benefits of Supine Yoga Poses
Supine poses offer a calming, restorative experience that soothes mind and body. Lying on the back allows muscles and joints to relax more fully. Key benefits include:
- Stress Reduction & Relaxation: Reclining asanas are grounding and activate the parasympathetic nervous system, promoting calm. They release tension in the neck, shoulders and back and can help with insomnia or anxiety.
- Improved Flexibility: Using gravity and props, supine poses deepen stretches (especially reclined twists and leg stretches) and enhance suppleness in hips and hamstrings.
- Spinal Health: Many supine twists and backbends lengthen and realign the spine without weight bearing, hydrating discs and releasing back muscles. For example, Supta Matsyendrasana (Reclined Twist) stretches the back and hips, aiding spinal mobility.
- Circulation & Digestion: Lying supine can improve blood flow to internal organs. Twists “wring out” digestive organs to stimulate elimination, while gentle backbends may boost circulation.
- Muscle Support & Rehabilitation: These poses often require less balance and are accessible even with limited strength. They provide support for knees, hips or injuries and are useful in rehab and for seniors.
- Ease for Beginners: With gravity as an ally, many supine poses are easier for newcomers. Beginners can practice reclined versions of familiar standing or seated poses (like Reclined Hero or Reclined Bound Angle) to build confidence.
- Integrative Cool Down: Yoga teachers typically sequence supine poses at the end of a class for integration. Lying flat on the back allows full relaxation, heightened body awareness, and mindful breathing. Corpse Pose (Shavasana) is the classic finale, facilitating deep rest.
Tips for Practicing Supine Poses Safely
Before trying supine poses, keep these safety and alignment tips in mind:
- Protect the Spine: Avoid pressing hard on the low back. Use a folded blanket under the spine or neck for cushioning if you feel strain. In inverted poses (like Plow or Shoulderstand), go gently to avoid compressing the cervical spine.
- Use Props: Bolsters, blocks and straps are invaluable. A block under the sacrum in Bridge Pose or a bolster under the knees in Savasana adds comfort. Straps on feet can help maintain foot flexion in leg stretches.
- Modify When Needed: If a pose causes pain (especially in the knees or neck), back off or try a gentler variation. For example, in Supine Twist keep the bottom leg bent or use a blanket under the knee for support.
- Breath Awareness: Maintain slow, deep breathing in all supine poses. Long exhales help your body relax. Focus on exhaling tension out of the body, especially in twists and restorative poses.
- Consult a Teacher: Especially for poses like Shoulderstand or Plow, work with a qualified instructor to learn alignment and precautions. If you have health issues (e.g. high blood pressure or spinal injury), check with a doctor or therapist before practicing supine inversions.
Common Supine Yoga Poses (Back Lying Asanas)
Below are detailed descriptions of several popular supine poses, including steps, modifications and benefits. Use them as a reference or teaching guide.
Reclined Bound Angle Pose (Supta Baddha Konasana)
How to: Lie on your back with knees bent and soles together, letting knees fall open to the sides. You may keep arms by your sides or place one hand on your belly and one on your heart. For added support, slide a block or bolster under your sacrum or under each knee. Relax your shoulders and neck on the floor. Breathe deeply into your groins and belly.
Benefits: This gentle hip opening pose stretches the inner thighs and groins, helps relax the hips and lower back, and calms the nervous system. It can relieve fatigue and mild anxiety. Resting here with props can make it restorative (e.g. Supta Baddha is common in prenatal or yin yoga classes).
Extended Supine Hand-to-Big-Toe Pose (Supta Padangusthasana)
How to: Lie on your back and hug one knee to your chest. Loop a strap (or use your hand) around the ball of the raised foot. Gently straighten that leg toward the ceiling, keeping the other leg grounded and the foot flexed. Hold onto your toe or strap; if your hamstrings are tight, keep a bend in the knee. Flex the grounded foot and press both hips evenly into the mat. After several breaths, switch sides.
Benefits: This hamstring stretch lengthens the legs while keeping the back supported. It relieves lower back tension (by flattening the lumbar curve) and can help with sciatica. It also improves flexibility in calves and hips.
Reclined Pigeon Pose (Sucirandhrasana)
How to: Lying on your back with knees bent, cross your right ankle over your left thigh (flexing the right foot). Thread your hands behind your left thigh and gently draw the thigh toward you. You should feel a stretch in your right outer hip and glute. Keep shoulders on the floor. Hold, then switch sides.
Benefits: Also called Eye of the Needle, this supine variation of Pigeon Pose deeply opens the hip without stressing the knees. It releases tension in the hips and lower back, lengthens gluteals and piriformis, and soothes the nervous system. It’s very relaxing and is often practiced at the end of a sequence.
Reclined Spinal Twist (Supta Matsyendrasana) Supine Twist Pose Yoga
How to: Lie on your back with knees bent and feet on the floor. Hug your right knee into your chest and shift your hips slightly to the right. As you exhale, guide the knee across your body to the left side of your mat. Stretch the right arm out in a T position and gaze right (opposite direction). Keep both shoulders on the floor. (Use a folded blanket under the knee for support if it does not reach the ground.) Breathe and hold for 5 to 10 breaths, feeling the gentle twist along the spine. Switch sides.

Benefits: The supine twist elongates and realigns the spine, stretches the back muscles and glutes, and massages the internal organs. It hydrates the spinal discs and stimulates digestion by compressing and then releasing the abdominal area. This calming twist is also deeply relaxing it relieves stress, opens the chest and shoulders, and can help ease lower back pain. As Dr. Yoga Collective notes, Supta Matsyendrasana is accessible to all levels and detoxifying.
Bridge Pose (Setu Bandha Sarvangasana)
How to: Lie on your back with knees bent and feet flat on the floor, hip width apart. Arms rest by your sides or interlace fingers under your lower back. Press firmly through your feet and lift your tailbone and hips up. Keep thighs parallel and shoulders grounded. You can keep hands down or clasp them beneath you for support. Hold the pose while breathing smoothly, then slowly lower the spine back down one vertebra at a time.
Benefits: As a supported backbend, Bridge Pose stretches the entire front body (chest, throat, hip flexors) and strengthens the back and legs. It improves posture and counteracts the effects of sitting. Studies and experts note that Bridge is both stimulating and restorative. Healthline reports it “stretches the spine and may relieve backaches and headaches”. It also gently opens the heart and lung area, which can relieve chest tightness and stress.
Happy Baby Pose (Ananda Balasana)
How to: Lie on your back. Bend your knees toward your armpits and hold the outer edges of your feet with your hands. Flex your feet. Keep your spine and head relaxed on the floor. You can also grab your big toes or place a strap around the balls of your feet if needed.
Benefits: Happy Baby is a favorite supine hip opener. It stretches the groins, hips, and inner thighs while gently rocking the body for extra relaxation. According to yoga experts, it releases the hips and back, reduces lower back pain, and calms the mind. The gentle rocking motion can be very soothing for anxiety or fatigue.
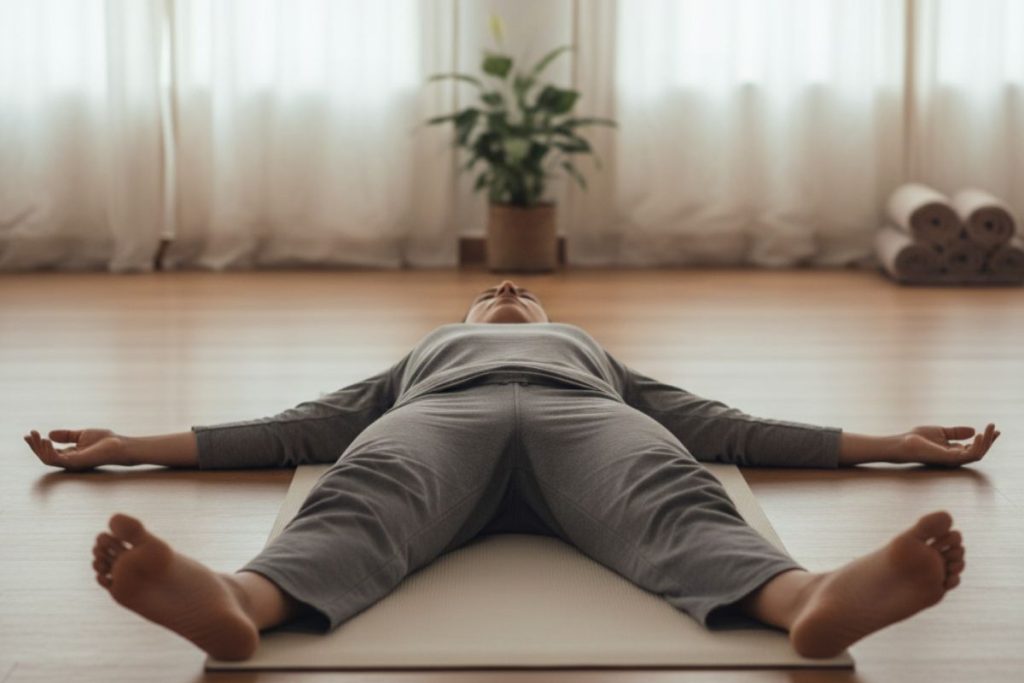
Legs-Up-the-Wall Pose (Viparita Karani)
How to: Sit sideways next to a wall, then swing your legs up as you lie flat on your back with hips close to the wall. Let your legs rest vertical against the wall, soles flexed. Arms can rest by your sides, palms up. You may place a folded blanket under your hips for support. Close your eyes and breathe deeply.
Benefits: Viparita Karani is a very gentle inversion. It drains tension from the legs and feet, improves circulation (especially after standing all day), and calms the nervous system. It’s often recommended for stress relief, mild lower back pain and edema (leg swelling). The inverted position also encourages a neutral spine with minimal effort. Many find it restful for meditation and recovery.
Corpse Pose (Shavasana)
How to: From lying on your back, extend your legs straight and let your feet fall open. Keep arms relaxed by your sides, palms facing up. Close your eyes and allow the entire body to fully relax on the floor. Focus on slow, deep breaths, scanning your body from toes to head to release any remaining tension. Stay in Shavasana for several minutes.
Benefits: Shavasana is considered one of the most challenging yet rewarding yoga poses. It symbolizes complete surrender. Focused breathing in this pose encourages deep rest. According to Medical News Today, in Shavasana you “focus on deep, slow breathing, which encourages deep, meditative rest and relieves stress”. It integrates the benefits of the practice, lowers heart rate and blood pressure, and can alleviate mild insomnia or anxiety. Yoga therapists often use Shavasana at the end of class to ensure students leave calm and restored.
Wind Relieving Pose (Pavanamuktasana)
How to: Lie on your back and hug both knees into your chest. You can also do one leg at a time. If holding both, clasp the shins and gently pull knees toward the sternum. Rock slightly side to side if comfortable. Keep your back and head relaxed on the mat.
Benefits: Also known as Knees-to-Chest Pose, this supine stretch is great for relieving bloating and gas by massaging the abdomen. It stretches the lower back and hips and provides a gentle, comforting squeeze to the belly area. Shvasa notes it “puts pressure on the abdomen, releasing blockages and improving digestion”. It is very relaxing and can soothe the nervous system before Shavasana.
Tips for Yoga Teachers & Beginners
- Sequencing: Yoga teachers often put supine poses at the end of a class to wind down. For example, after more active postures, lead students into Reclined Twist, then Bridge, and finish with Shavasana. Beginners feel safe lying down as they ease into deeper stretches.
- Beginner Guidance: Most supine poses are accessible to beginners. Instructors should emphasize letting gravity do the work and encourage the use of props. Hold each pose for 6-12 breaths (longer in restorative classes) to get benefits. It is normal to hold these poses longer than standing ones.
- Breathing Cues: Remind students to keep breathing steadily. For twists, exhale fully as they fold, and inhale to create space in the spine. For hip openers like Reclined Bound Angle, suggest deep exhales into tight areas. Conscious breathing enhances relaxation.
- Variations: Many supine poses have variations. Example: Supta Padangusthasana A vs. B (leg straight vs. open sideways). For Supta Virasana (Reclined Hero), start by sitting on a block between heels before reclining fully. Teaching these options helps accommodate different levels.
- Props & Equipment: Ensure students have yoga mats, blocks, straps and blankets handy. Slippery mats can be problematic in supine poses if feet slide; a strap can help hold the foot. Bolsters under knees or hips increase comfort and alignment.
- Precautions: Remind students to move slowly. For those with knee, neck or spinal issues, certain poses (like Shoulderstand or deep Baddha Konasana) may need modification or avoidance. Always recommend students listen to their bodies if something feels painful or overstretchy, back off or use support.
Frequently Asked Questions
Q: What exactly are supine yoga poses?
A: Supine yoga poses are asanas performed while lying on your back (face up). They often begin with the Sanskrit word supta. These poses range from simple rest positions (like Corpse Pose) to gentle twists and backbends. Supine poses are commonly used for relaxation, stretching, and integrating a yoga practice.
Q: What is a supine twist yoga pose?
A: A supine twist (Supta Matsyendrasana) involves lying on the back and gently twisting the torso. For example, in Reclined Spinal Twist you hug one knee and lower it across the body, keeping shoulders grounded. This reclined twist pose stretches the spine and hips, massages abdominal organs and aids digestion. It is very calming and helps relieve back and shoulder tension.
Q: Are supine poses good for back pain?
A: Yes. Many supine poses relieve back tension because the spine is supported. Poses like Bridge and Wind-Relieving (knees-to-chest) stretch and strengthen the back and spine. Health experts note that Bridge Pose “stretches the spine and may relieve backaches”. Gentle twists like Supta Matsyendrasana can also alleviate lower back pain by relaxing tight muscles. Medical sources (NCCIH) agree that yoga, including supine asanas, can improve chronic low back pain.
Q: Can beginners practice supine yoga poses?
A: Absolutely. Supine poses are often easier for beginners because balance is not required and the floor supports most of the body weight. Even a yoga newbie can lie down and try poses like Happy Baby, Legs-Up-the-Wall, or Corpse Pose safely. Using props like blankets or blocks makes them even more accessible. As Shvasa Yoga notes, supine postures often feel easier for beginners and do not require prior experience. They are ideal for building flexibility and body awareness.
Q: How should I incorporate props in supine poses?
A: Props enhance comfort and alignment. For example, in Bridge Pose, place a block under the sacrum to practice a supported bridge. Use a strap in Supine Hand-to-Big-Toe Pose if hamstrings are tight. Place a blanket under the neck or knees in relaxation poses. Props allow students (or you) to stay longer in a pose and focus on breath. As YogaBasics advises, a blanket under the spine or bolster under knees can make supine asanas more comfortable. Encourage experimentation with cushions, straps, blankets and blocks.
Q: Why are supine yoga poses important for relaxation?
A: Lying down and using gravity promotes complete relaxation. In supine poses the body has a chance to “reset.” Each time you return to lying on the back, you integrate the effects of the practice. The support of the mat allows muscles to let go more easily. Twists performed supine can more deeply rotate the spine as gravity pulls the knee. And ending with Shavasana ensures you leave class calm. In short, supine asanas help the nervous system shift from stress (sympathetic) to healing mode (parasympathetic), making relaxation profound.
Integrating supine yoga poses into your practice can transform the way you wind down and heal. Whether you’re a beginner or a teacher, focus on slow movements, steady breath, and support. Try adding a new supine pose each week and observe the improvements in flexibility, stress relief, and body awareness. Share this guide with your yoga community and let us know: What’s your favorite supine yoga pose? Drop a comment or social post below to join the conversation. Happy practicing, and namaste!